Are you ready to transform your outdoor spaces into stunning works of art?
Did you know that stamping concrete is a popular DIY project that allows you to add beautiful patterns and textures to your plain concrete surfaces? In fact, according to recent surveys, over 50% of homeowners are choosing stamped concrete to enhance their patios and walkways.
With our step-by-step instructions and a little creativity, you can achieve professional-looking results without spending a fortune. This article will provide you with all the necessary tools, materials, and safety precautions, ensuring a successful project.
Get ready to belong to a community of DIYers who are bringing artistry to their outdoor spaces with the beauty of stamped concrete.
Let’s get started!
Benefits of DIY Stamped Concrete
One of the main benefits of tackling a DIY stamped concrete project is that you can save a significant amount of money. Hiring professionals for this task can be expensive, but by doing it yourself, you can cut down on labor costs and only pay for the materials needed. This cost savings allows you to allocate your budget towards other aspects of your project or even use the extra funds for other home improvements.
Not only does DIY stamped concrete offer cost savings, but it also allows you to unleash your creativity. You have the freedom to choose from a wide range of stamping patterns and colors, giving you the opportunity to create a unique design that reflects your personal style. Whether you prefer a classic stone pattern or a more intricate design, the customization options are endless.
Another benefit is that DIY stamped concrete can increase the value of your property. By transforming your outdoor spaces with professional-looking stamped concrete, you create a visually appealing and durable feature that can attract potential buyers. Stamped concrete adds curb appeal and enhances the overall aesthetic of your home, making it a valuable investment.
Durability is yet another advantage of DIY stamped concrete. When properly installed and maintained, stamped concrete can withstand heavy foot traffic, extreme weather conditions, and everyday wear and tear. Unlike traditional concrete, stamped concrete is reinforced with fibers or steel, making it resistant to cracking and shifting.
Essential Tools and Materials
To continue your DIY stamped concrete project, you’ll need to gather the essential tools and materials. Luckily, there are cost-effective options available that still provide professional-looking results. Let’s explore the top-rated tools you’ll need to create beautiful and durable stamped concrete.
First and foremost, safety precautions should always be a priority. Make sure to wear protective gear, such as safety goggles, gloves, and a mask, to safeguard yourself from any potential hazards.
Now, onto the tools. A concrete mixer is essential for combining the cement, water, and other additives to create the perfect consistency. Look for a top-rated mixer that can handle the amount of concrete you’ll be working with.
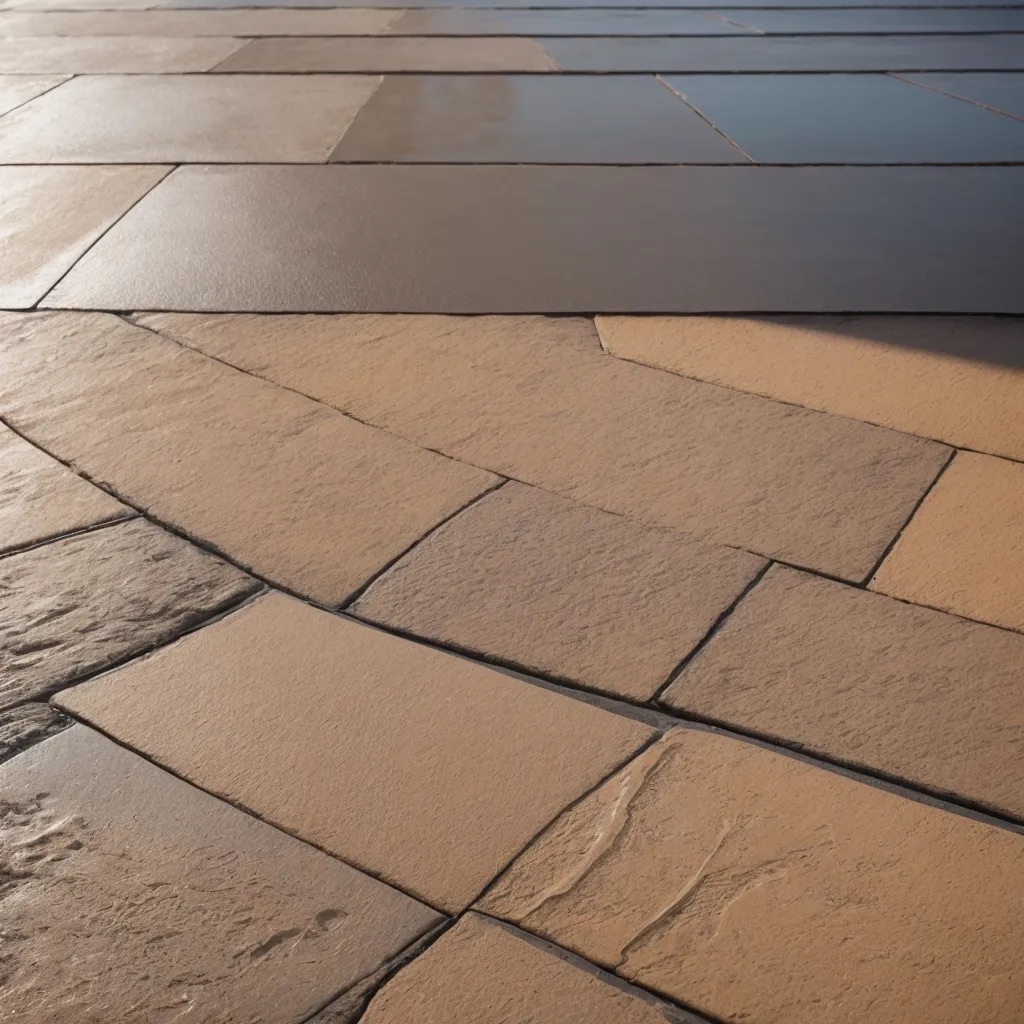
Next, you’ll need concrete stamps to create the desired patterns on the surface. These stamps come in a variety of creative patterns, ranging from cobblestone to brick and even wood grain. Choose stamps that match your vision and ensure they’re made of durable materials to withstand repeated use.
To apply the concrete, you’ll need a concrete trowel or float. This tool helps you spread and smooth the concrete evenly. Look for a trowel with a comfortable grip and a sturdy construction to ensure ease of use and longevity.
Lastly, don’t forget about the finishing touches. A concrete sealer will protect your stamped concrete from stains, weathering, and wear and tear. Look for a high-quality sealer that’s specifically designed for stamped concrete to ensure its effectiveness.
Step-by-Step Guide for Stamping Concrete
Now that you have gathered the essential tools and materials, it’s time to dive into the step-by-step guide for stamping concrete.
First, you’ll need to choose your stamp patterns. There are a variety of options available, such as brick, stone, and wood textures, so pick the one that best suits your desired aesthetic.
Next, consider the color options for your stamped concrete. You can achieve different shades and tones by using integral color, which is mixed into the concrete, or by applying a color hardener or stain after the concrete has been poured. Experiment with different combinations to find the perfect look for your outdoor space.
Before you start stamping, proper surface preparation is key. Make sure the concrete is clean, free of debris, and smooth. If there are any cracks or uneven areas, you’ll need to repair and level them before proceeding.
Once the surface is ready, it’s time to start stamping. Apply a release agent to the concrete to prevent the stamps from sticking. Then, press the stamp patterns into the concrete, making sure to overlap the impressions for a seamless look. Work in small sections to ensure the release agent doesn’t dry out before stamping.
After you’ve finished stamping, it’s important to allow the concrete to cure properly. This process typically takes around 24 to 48 hours, depending on the weather conditions. During this time, keep the concrete moist to prevent cracking and promote a strong, durable finish.
Finally, to maintain the beauty of your stamped concrete, follow these maintenance tips. Regularly sweep away dirt and debris, and wash the surface with a mild detergent and water as needed. Avoid using harsh chemicals or abrasive cleaners that could damage the stamped surface.
Now that you have completed the step-by-step guide for stamping concrete, let’s move on to the next section to learn some tips for achieving professional-looking results.
Tips for Achieving Professional-Looking Results
To achieve professional-looking results when stamping concrete, focus on proper technique and attention to detail. Here are some tips to help you achieve the best possible outcome for your DIY stamped concrete project:
- Surface Preparation: Before starting the stamping process, ensure that the concrete surface is clean and free of debris. Repair any cracks or imperfections, and make sure the surface is properly cured. This will provide a smooth and even canvas for your stamped design.
- Color Options: Choose a color that complements your outdoor space and desired aesthetic. There are various coloring options available, such as integral color, concrete stains, and dyes. Experiment with different shades to achieve the desired look.
- Sealing Techniques: Once the stamped concrete is dry, apply a high-quality sealer to protect it from stains, UV damage, and wear. Choose a sealer that’s suitable for the climate in your area and follow the manufacturer’s instructions for application.
- Maintenance Tips: To keep your stamped concrete looking its best, regular maintenance is essential. Sweep away debris, wash with a mild detergent and water, and reapply sealer as needed. Avoid using harsh chemicals or abrasive cleaners that can damage the surface.
- Troubleshooting Common Issues: If you encounter any issues during the stamping process, such as uneven imprints or color inconsistencies, don’t panic. Most problems can be fixed by reapplying the stamp or adjusting the color application. Take your time, be patient, and don’t hesitate to seek guidance from professionals if needed.
By following these tips, you can achieve professional-looking results with your DIY stamped concrete project.
Now, let’s explore some inspiring DIY stamped concrete projects that will spark your creativity and help you transform your outdoor spaces.
Inspiring DIY Stamped Concrete Projects
Take a look at these impressive DIY stamped concrete projects that will inspire you to bring artistry to your outdoor spaces. When it comes to creative designs, the possibilities are endless. You can explore unique patterns and motifs for your stamped concrete, such as intricate geometric shapes, floral designs, or even custom logos. Let your imagination run wild and create a one-of-a-kind masterpiece in your outdoor area.
To enhance the visual appeal of your stamped concrete, consider adding colorful finishes. Vibrant hues can bring life and personality to your outdoor spaces. You can experiment with different shades and tones to create a visually stunning effect. Whether you prefer a subtle pop of color or a bold statement, adding vibrant hues is a great way to make your stamped concrete stand out.
Achieving stunning results doesn’t have to break the bank. There are budget-friendly options available for DIY stamped concrete projects. For example, instead of using expensive materials like natural stone, you can opt for concrete stamps that mimic the look of stone but at a fraction of the cost. Additionally, you can use affordable coloring techniques to achieve the desired effect without spending a fortune.
One way to add interest and texture to your stamped concrete is by repurposing materials. Consider using unconventional items like leaves, seashells, or even old tools to create interesting textures. By pressing these items onto the wet concrete, you can leave behind unique imprints that add character and dimension to your stamped surface.
Finally, let’s not forget the outdoor inspiration that DIY stamped concrete can bring. Transforming your outdoor spaces with stamped concrete can create a cozy and inviting atmosphere. Whether it’s a patio, pool deck, or walkway, stamped concrete can elevate the aesthetic and functionality of your outdoor area, making it a place where you and your loved ones can relax and enjoy the beauty of nature.
Now that you’ve seen these inspiring DIY stamped concrete projects, it’s time to unleash your creativity and start bringing artistry to your own outdoor spaces. With the right tools, materials, and a little bit of patience, you can create stunning stamped concrete that will leave a lasting impression.